
In a world where big ideas often start as simple sketches on napkins, turning those dreams into tangible reality has never been easier—or more thrilling—thanks to the magic of 3D printing. Imagine holding your innovative concept in your hands, tweaking and refining it until it’s perfect. Welcome to the fascinating realm of 3D printing prototypes for product development! Whether you’re an enthusiastic hobbyist, a forward-thinking entrepreneur, or a seasoned engineer, this miraculous intersection of art and technology can transform your creative process. Let’s embark on a colorful journey through the delightful world of 3D printing, where pixels morph into plastics, and your visions materialize with a satisfying blend of precision and imagination. Ready to bring your ideas to life? Let’s dive in!
Mastering the Art of 3D Printing: Prototyping Essentials
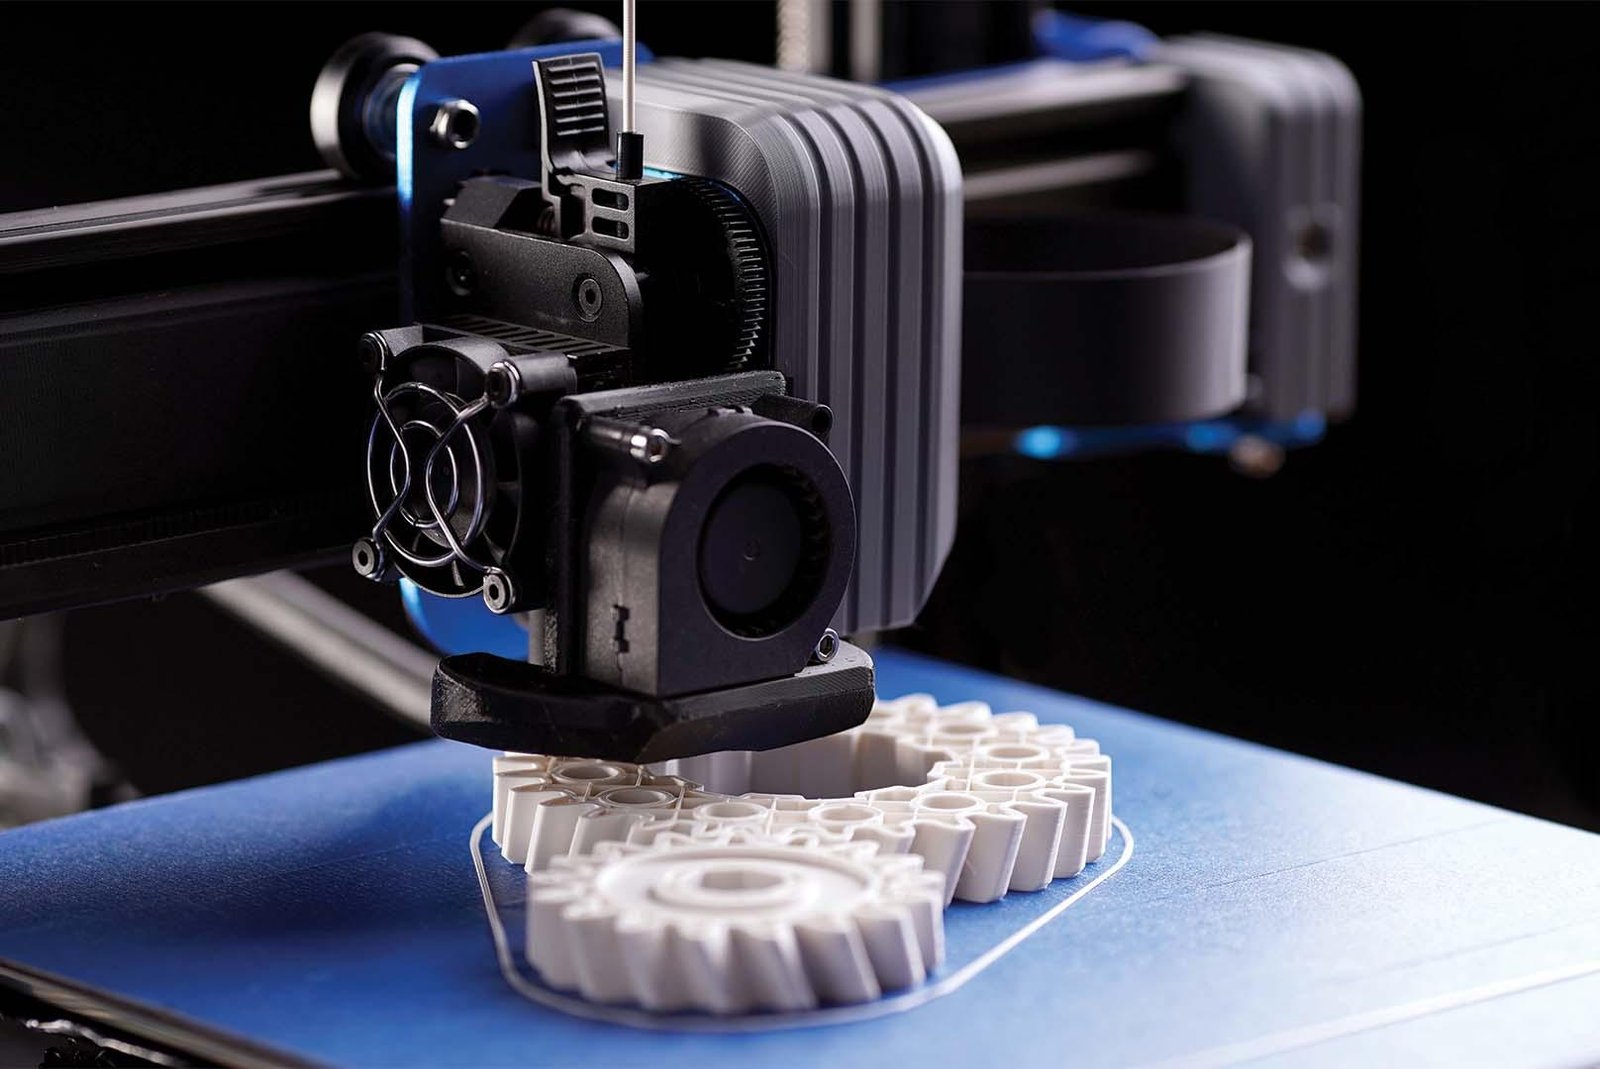
When diving into 3D printing for product development, understanding the essentials of prototyping is key. *Choosing the right materials* is one of the most crucial steps. Your choice can **influence factors** such as durability, flexibility, and cost. Here are some common 3D printing materials:
- PLA (Polylactic Acid): Ideal for beginners, it’s easy to use and environmentally friendly.
- ABS (Acrylonitrile Butadiene Styrene): Stronger and more heat-resistant, perfect for functional prototypes.
- TPU (Thermoplastic Polyurethane): Flexible and durable, suitable for products requiring elasticity.
Beyond materials, the accuracy and detail of your print can make or break your prototype. Leveraging *different print settings* can optimize the quality of your design. Experimenting with settings like layer height, print speed, and infill percentage is essential for creating precision prototypes:
| Print Setting | Recommendation | Impact |
|---|---|---|
| Layer Height | 0.1 – 0.2 mm | Higher detail and smoother finish |
| Print Speed | 40 - 60 mm/s | Balances quality and printing time |
| Infill Percentage | 20 – 50% | Strength and weight control |
Fine-tuning these parameters allows you to achieve the perfect balance of detail and functionality, making your prototype a reliable and accurate representation of your final product.

Choosing the Right Materials for Your Products Success
One of the crucial steps in achieving a successful 3D printed prototype is selecting the right materials. Each material holds unique properties that can dramatically influence the performance and appearance of your prototypes. For instance, **PLA (Polylactic Acid)** is an excellent choice for beginners due to its ease of use and eco-friendly nature, making it great for visual models. **ABS (Acrylonitrile Butadiene Styrene)**, on the other hand, offers more durability and resistance to heat, which is ideal for functional parts subjected to stress or high temperatures.
Beyond these common materials, consider **specialty filaments** that offer unique characteristics like flexible TPU for rubber-like parts or PETG for a balanced mix of strength and flexibility. To help you navigate this, we’ve created a quick comparison table:
| Material | Primary Properties | Best For |
|---|---|---|
| PLA | Eco-friendly, easy to print | Visual models, beginners |
| ABS | Durable, heat-resistant | Functional parts, stress testing |
| TPU | Flexible, rubber-like | Wearables, flexible parts |
| PETG | Strong, flexible | Functional parts, versatile usage |
Choose your materials wisely to align with your prototype’s requirements and ensure a smoother path towards your product’s success.

Navigating Software and Design Tips for Seamless Printing
When you’re gearing up to bring your 3D printed prototype to life, mastering the software and design nuances can make all the difference. **Choosing the right CAD software** is your first major step. High-quality programs like Fusion 360, Tinkercad, and SolidWorks offer robust functionalities that cater to various levels of expertise. Notably, Fusion 360 provides parametric design features that are advantageous for creating complex geometries and iterations. *The key is to start simple before integrating intricate details.* Most importantly, always remember to check your design for any potential print issues through built-in functions like mesh integrity checks.
**Designing for printability** should ease your pathway from screen to physical model. Here are some quick tips:
- **Wall Thickness**: Maintain an optimal wall thickness to avoid weak points in your print.
- **Overhangs and Supports**: Design with minimal overhangs to reduce the need for supports, which will save on material and print time.
- **Layer Height**: Adjust your layer height settings based on the detail level and speed you want; finer layers for detailed prints and thicker layers for faster results.
| **Parameter** | **Recommendation** |
|---|---|
| Wall Thickness | 1-2 mm |
| Layer Height | 0.1 mm (fine) – 0.3 mm (fast) |
| Infill Density | 20%-40% |
Optimizing your slicing settings is equally crucial. Experiment with different slicers like Cura or PrusaSlicer, which offer various modes and community-driven profiles that can significantly enhance your print quality. **Remember**, trial and error is part of the process, so don’t be afraid to iterate and tweak settings to achieve that perfect prototype. Happy printing!

Maximizing Efficiency: Post-Processing Techniques Unveiled
After your 3D print is complete, post-processing plays a critical role in pushing your prototype to the next level. One of the most effective techniques is **sanding**. This involves gently polishing the surface to remove any layer lines or imperfections. Start with a coarse grit sandpaper, like 100-150, then gradually move to finer grits up to 400 or higher for a silky finish. To save time, consider using an electric sander—just be careful not to sand too aggressively, which could alter the dimensions of your model.
Another fantastic method is **chemical smoothing**. For instance, PLA prints can benefit from a little TLC with ethyl acetate, while ABS can be smoothed with acetone vapor. Remember, safety comes first; always handle chemicals in a well-ventilated area and wear appropriate protective gear. Besides these, **painting** and **priming** can make your prototype look professional. After applying a primer, use **acrylic paints** for a durable, photo-ready finish. And don’t forget **adhesion** strategies such as **gluing** or **welding** for assembling multi-part prints.
| Technique | Materials/Tools | Notes |
|---|---|---|
| Sanding | Sandpaper (100-400 grit) | Start coarse, finish fine |
| Chemical Smoothing | Acetone, Ethyl acetate | Use in ventilated area |
| Painting | Acrylic paints, Primer | Apply primer first |
| Gluing | Plastic adhesive | Perfect for multi-part prints |
Q&A
Q&A: Mastering 3D Printing for Product Development Prototypes
Q1: What’s the big deal about 3D printing for prototyping?
A1: Oh, where do we start? Imagine being able to hold your wildest product ideas right in your hands, in just a few hours! 3D printing is like having a tiny factory on your desk. It’s cost-effective, fast, and lets you iterate designs quickly—perfect for turning those brilliant concepts into reality without breaking the bank!
Q2: What basic equipment do I need to get started with 3D printing prototypes?
A2: First things first, you need a 3D printer. There are many types, but for beginners, a reliable FDM (Fused Deposition Modeling) printer is a great start. You’ll also need filament (the material the printer uses to create objects), a computer with CAD (Computer-Aided Design) software for designing your prototypes, and some slicing software to convert those designs into instructions your 3D printer can understand.
Q3: Can you recommend any good CAD software for beginners?
A3: Absolutely! Tinkercad is a fantastic choice for newbies—it’s user-friendly, web-based, and free! If you’re looking for something a bit more advanced, Fusion 360 and Blender are excellent options. They offer more sophisticated tools as you become more comfortable with 3D design.
Q4: How do I ensure my prototype is printed accurately?
A4: Great question! It all boils down to a few key tips:
- Calibrate your printer properly: Make sure your printer’s bed is leveled and your nozzle is at the right height.
- Use supports wisely: If your design has overhangs or complex features, supports can prevent sagging and ensure crisp details.
- Optimize print settings: Pay attention to layer height, print speed, and infill density. These settings can drastically affect the quality and strength of your prototype.
Q5: What materials should I use for printing prototypes?
A5: PLA (Polylactic Acid) is the go-to for many beginners—it’s eco-friendly, easy to print, and comes in a rainbow of colors. If you need something tougher, ABS (Acrylonitrile Butadiene Styrene) and PETG (Polyethylene Terephthalate Glycol) are excellent for more durable prototypes. For specialized needs, like flexible or heat-resistant prototypes, TPU (Thermoplastic Polyurethane) or Nylon could be your best friend.
Q6: Any tips for designing a successful 3D printed prototype?
A6: Definitely! Keep these golden rules in mind:
- Start simple: Don’t overload your first designs with too much detail. Build up your skills gradually.
- Think about support structures: Design with printability in mind—minimize overhangs and consider how supports will affect the final appearance.
- Iterate, iterate, iterate: Your first print might not be perfect. Use it to learn and refine your design.
Q7: How do I move from a prototype to a final product?
A7: Each prototype is a stepping stone. Test your 3D printed prototypes, gather feedback, and make necessary adjustments. Once you’re satisfied, you might use other manufacturing methods, like injection molding, for mass production. But hey, 3D printing is becoming viable for small-batch production too!
Q8: What common mistakes should I avoid in 3D printing?
A8: Ah, the classic pitfalls. Here are a few:
- Ignoring maintenance: Keep your printer clean and well-maintained to avoid print failures.
- Skimping on quality filament: Cheap filament can lead to poor prints and clog your nozzle. Invest in good stuff.
- Rushing designs: Patience is key. A rushed design can lead to flawed prints. Take your time to get it right.
Q9: Any final tips for someone new to 3D printing?
A9: Dive in with curiosity and don’t be afraid to experiment. Join 3D printing communities—online forums, local meetups, or social media groups. They’re goldmines of advice and support. Most importantly, have fun! 3D printing is as much about the journey as the final product. Enjoy every layer of your new creative adventure!
And there you have it—your friendly guide to jumping into the revolutionary world of 3D printed prototypes. Happy printing!
To Wrap It Up
As the final layer of filament cools and the printer’s hum gradually quiets, we’re left marveling at the boundless potential of 3D printing in the world of product development. From sketchpad scribbles to tangible prototypes, the journey is a harmonious blend of creativity, precision, and innovation.
Whether you’re a garage inventor dreaming up disruptive technologies or a seasoned engineer refining the next game-changer, 3D printing empowers you to turn imagination into reality—one layer at a time. With every trial and tweak, you seize the opportunity to push the boundaries of what’s possible, embracing a future where prototyping is faster, smarter, and infinitely more accessible.
So, fire up those printers, iterate to perfection, and keep pushing forward. The prototypes you create today are the first steps toward tomorrow’s breakthroughs. Happy printing!