
Imagine discovering a whole new world of creativity and innovation, where you can build your own electronic devices and bring your ideas to life. Yes, you heard it right! With DIY Electronics Kits, you can explore the exciting world of Arduino Projects. From designing interactive robots to controlling sensors and lights, these kits offer endless possibilities for DIY enthusiasts and aspiring engineers alike. Join us as we embark on a journey through this captivating world, filled with fascinating projects that inspire imagination and ignite a passion for electronics.

This image is property of Amazon.com.
What are DIY Electronics Kits?
Definition of DIY Electronics Kits
DIY Electronics Kits are bundles of electronic components, tools, and instructional materials that allow individuals to build and create their own electronic projects. These kits are specifically designed to be assembled by the user and often come with step-by-step instructions, making them suitable for beginners and experienced makers alike. They provide a hands-on approach to learning about electronics and programming, offering a practical and enjoyable way to explore the world of technology.
Why are DIY Electronics Kits popular?
DIY Electronics Kits have gained immense popularity in recent years due to several reasons. Firstly, they provide a convenient and affordable way to get started with electronics projects. These kits usually come with all the necessary components, eliminating the need for tedious searching and purchasing of individual parts. Secondly, the step-by-step instructions included in the kits make it easy for beginners to dive into the world of electronics without prior knowledge or experience. Additionally, DIY Electronics Kits offer a creative outlet for makers and enthusiasts to express their ideas and bring them to life. The satisfaction of seeing a project come together and work successfully is a major reason why these kits are beloved by many.
Benefits of DIY Electronics Kits
There are numerous benefits to using DIY Electronics Kits. One of the primary advantages is the hands-on learning experience they provide. By physically assembling and programming their own projects, individuals gain a deeper understanding of the underlying concepts of electronics and coding. This practical approach enhances problem-solving and critical thinking skills, fostering a sense of creativity and innovation. DIY Electronics Kits also encourage experimentation, allowing users to modify and customize their projects according to their preferences. This promotes an iterative learning process, where mistakes are seen as opportunities to learn and improve. Moreover, these kits offer a supportive and inclusive community of makers who share their knowledge and experiences, creating a collaborative learning environment. Overall, DIY Electronics Kits are an excellent way to develop practical skills while having fun with technology.
Getting Started with Arduino
Introduction to Arduino
Arduino is a popular open-source electronics prototyping platform that consists of both hardware and software components. It provides a flexible and accessible platform for creating interactive electronic projects, making it an ideal choice for beginners and experienced makers alike. Arduino boards are equipped with input/output pins that can be connected to various sensors, actuators, and other components, allowing users to control and interact with their projects. The Arduino software, known as the Integrated Development Environment (IDE), simplifies the process of writing and uploading code to the Arduino board.
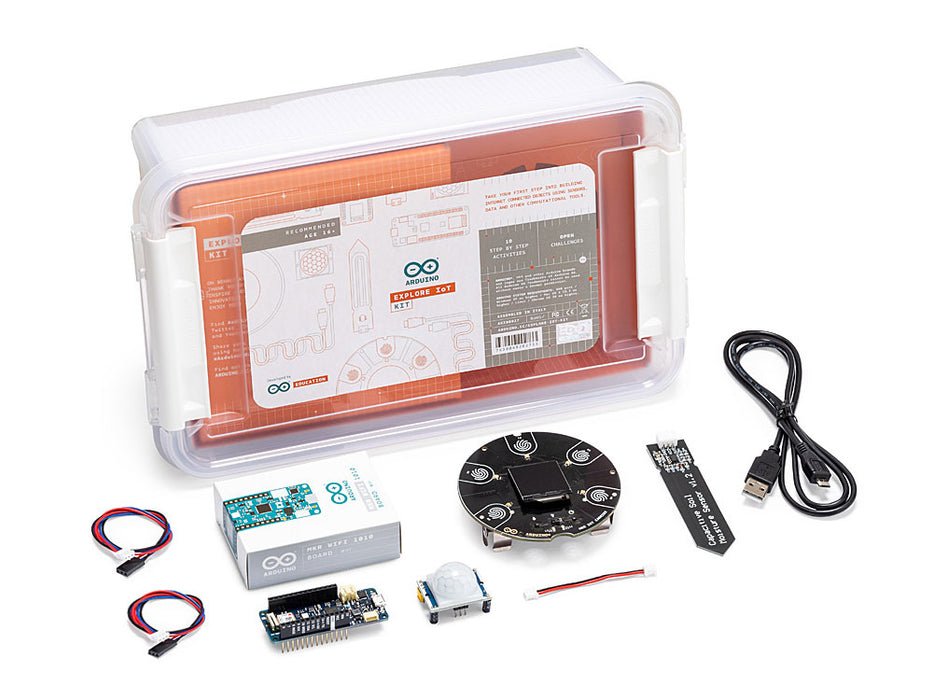
Components in an Arduino Kit
When getting started with Arduino, it’s important to have the necessary components to build your projects. An Arduino kit typically includes an Arduino board, various electronic components such as resistors, capacitors, LEDs, and sensors, as well as breadboards, jumper wires, and a USB cable for connecting the Arduino to your computer. These components are essential for building circuits and connecting them to the Arduino board. Additionally, some kits may include a beginner’s guide or tutorial to help users understand the basics of Arduino and get started with their first project.
Basic Arduino Projects
Arduino offers a wide range of projects that can be implemented by beginners. Some popular basic projects include LED Blinking, where users learn to control the blinking of an LED using simple code, and Temperature and Humidity Monitoring, where sensors are used to measure and display environmental conditions. Arduino also allows users to create Motion Detection projects by utilizing sensors to detect movement, enabling applications such as security systems or interactive installations. Additionally, Arduino can be used to create Robotics projects, where motors and sensors combine to build autonomous or remotely controlled robots. Home Automation projects are also possible with Arduino, allowing users to remotely control lights, appliances, and security systems within their homes.
Online Resources for Arduino Tutorials
The Arduino community is vast and supportive, with numerous online resources available to assist beginners in their learning journey. Websites such as Arduino’s official website, Arduino Project Hub, and Instructables provide tutorials, step-by-step guides, and project ideas for users of all skill levels. YouTube channels dedicated to Arduino, such as “Core Electronics” and “GreatScott!”, offer video tutorials and demonstrations. Furthermore, online forums and communities such as Arduino Forum and Reddit’s r/arduino are great places to ask questions, seek help, and connect with fellow Arduino enthusiasts. These resources ensure that beginners have access to a wealth of knowledge and support as they embark on their Arduino projects.

This image is property of store-usa.arduino.cc.
Different Types of Arduino Kits
Starter Kits for Beginners
Starter kits for beginners are designed to provide everything needed to get started with Arduino projects. These kits typically include an Arduino board, essential components such as LEDs, resistors, and sensors, breadboards, jumper wires, and a beginner’s guide or tutorial. They are specifically curated to introduce beginners to the basics of electronics and coding, offering a gentle learning curve. Starter kits often include simple projects that allow users to practice their skills and gradually build confidence. They are a perfect choice for those who are new to Arduino and want a comprehensive introduction to the world of DIY electronics.
Advanced Kits for Experienced Makers
For those with prior experience in electronics and Arduino, advanced kits provide a more challenging and elaborate set of projects. These kits may include additional components such as motors, LCD displays, and wireless communication modules, allowing users to explore more complex applications. Advanced kits often assume a certain level of familiarity with Arduino and programming, making them suitable for users who have completed beginner projects or possess a solid understanding of electronics fundamentals. These kits are designed to push the boundaries of creativity and provide more advanced challenges for experienced makers.
Specialized Kits for Specific Projects
In addition to starter and advanced kits, there are also specialized kits available for specific projects or applications. These kits are tailored to meet the requirements of specific fields or interests, such as robotics, automation, and environmental monitoring. Specialized kits often include components and sensors specific to the project theme, enabling users to dive deeper into a particular area of interest. These kits can be a great option for individuals who already know the specific project they want to work on or have a particular field they want to explore.
Choosing the Right DIY Electronics Kit
Considerations for Beginners
When choosing a DIY Electronics Kit as a beginner, there are several factors to consider. Firstly, ensure that the kit provides a comprehensive introduction to Arduino and includes a beginner’s guide or tutorial. This will help you understand the basics of electronics, coding, and how to connect components to the Arduino board. It’s also important to choose a kit that offers a good variety of components, allowing you to experiment with different types of projects. Look for kits that include common components like resistors, capacitors, LEDs, and sensors, as these are frequently used in various projects. Lastly, consider the reputation and customer reviews of the kit, as they can provide valuable insights into the overall quality and user experience.
Considerations for Experienced Makers
Experienced makers should consider their specific requirements and goals when choosing a DIY Electronics Kit. If you are looking to expand your knowledge and skills, consider advanced kits that offer more complex projects and components. Look for kits that cover topics such as robotics, wireless communication, or automation, depending on your interests. Additionally, consider the compatibility and expandability of the kit. Ensure that the kit is compatible with other Arduino boards and shields, as this will allow you to integrate additional functionalities and expand your projects. Moreover, consider whether the kit includes documentation and examples specific to the advanced topics you want to explore.
Reviewing Kit Contents and Project Examples
Before purchasing a DIY Electronics Kit, review the kit contents and project examples to determine if it aligns with your interests and goals. Carefully check the list of components included in the kit and verify that it covers the essentials you need for your desired projects. Look for any additional components or modules that may be of interest or expand the possibilities of your projects. Additionally, review the project examples provided in the kit or online documentation. These examples will give you an idea of the complexity of the projects and whether they align with your skill level and interests. It’s also helpful to read reviews or feedback from other users who have purchased the kit to gather insights on the quality and usefulness of the projects and components included.

This image is property of store-usa.arduino.cc.
Popular Arduino Projects
LED Blinking
LED Blinking is one of the most basic and common projects for beginners to start with Arduino. It involves connecting an LED to an Arduino board and programming it to blink at a desired frequency. This project introduces users to the fundamentals of digital output and the basics of programming syntax. By modifying the code, users can experiment with different light patterns and timings, allowing for creativity and personalization.
Temperature and Humidity Monitoring
Temperature and Humidity Monitoring projects are practical applications of Arduino that involve using sensors to measure and display environmental conditions. By connecting a temperature and humidity sensor to an Arduino board, users can monitor and display real-time temperature and humidity readings either on an LCD display or through a computer interface. This project introduces users to analog input and digital output, as well as the use of sensors for real-world data acquisition.
Motion Detection
Motion Detection projects utilize sensors such as Passive Infrared (PIR) motion sensors with Arduino to detect movement. These projects are commonly used in applications such as security systems, automatic lighting, and interactive installations. By connecting the PIR motion sensor to an Arduino board and programming it to react to detected motion, users can create projects that trigger actions when motion is detected, such as turning on a light or activating an alarm.
Robotics
Arduino is widely used in robotics projects due to its versatility and ease of use. Robotics projects can range from simple line-following robots to complex autonomous robots. By connecting motors, sensors, and other components to an Arduino board, users can create robots that can sense and respond to their environment. These projects teach users about motor control, sensor integration, and the principles of robotics.
Home Automation
Home Automation projects with Arduino enable users to remotely control various aspects of their homes, such as lights, appliances, or security systems. By connecting Arduino to modules such as relays or wireless communication modules, users can create a centralized control system for their home. This allows for convenience, energy efficiency, and enhanced security. Home Automation projects can be expanded to include voice control, smartphone integration, or even integration with other Internet of Things (IoT) devices.
Exploring Sensors and Modules
Introduction to Sensors and Modules
Sensors and modules play a crucial role in Arduino projects as they allow users to detect and interact with their environment. Sensors are devices that convert physical or environmental stimuli into electrical signals. They can measure various parameters such as temperature, humidity, light intensity, motion, and many more. Modules, on the other hand, are pre-assembled components that provide additional functionalities or convenience. Modules can include wireless communication modules, motor driver modules, and display modules. Exploring sensors and modules opens up a wide range of possibilities for creating innovative and interactive projects.
Commonly Used Sensors and Modules
There are countless sensors and modules that can be integrated with Arduino, but some commonly used ones include:
- Temperature and Humidity Sensor: Measures the ambient temperature and humidity, enabling projects such as weather stations or indoor climate monitoring.
- Light Sensor (LDR): Measures the light intensity in the surrounding environment, allowing projects such as automatic lighting or light-sensitive alarms.
- Ultrasonic Sensor: Utilizes sound waves to measure distance, enabling applications such as object detection, proximity sensing, and obstacle avoidance in robotics projects.
- Servo Motor: A type of motor that allows for precise control of angular position and speed. It is commonly used in robotics and automation projects.
- Wi-Fi Module: Enables wireless communication between Arduino and other devices or the internet, making it possible to create IoT applications or remotely control Arduino projects.
- LCD Display: Provides a visual output for projects, allowing users to display data or information. LCD displays can be used in various applications, such as temperature monitoring or menu interfaces.
These are just a few examples of the sensors and modules available for Arduino projects. The possibilities are virtually endless, and exploring different sensors and modules allows users to expand their knowledge and creative potential.
Integration of Sensors and Modules with Arduino
Integrating sensors and modules with Arduino involves connecting them to the Arduino board and programming it to read and interpret the sensor data or control the module’s functionalities. Arduino boards have dedicated pins for various types of communication, such as analog input, digital input/output, and serial communication. These pins can be used to connect sensors and modules, allowing for data transfer and control signals. By utilizing the appropriate Arduino libraries and programming techniques, users can then write code to interact with the connected sensors and modules. This integration empowers users to create projects that sense, react, and interact with the environment around them.

This image is property of cdn11.bigcommerce.com.
Programming Arduino
Basics of Arduino Programming
Arduino programming is based on the C/C++ programming language, although it utilizes a simplified version of the language and offers specific functions and libraries to facilitate programming for beginners. The programming language used by Arduino is also referred to as the “Arduino language” or “Arduino sketch.” The Arduino IDE provides an integrated development environment specifically designed for Arduino programming. In the Arduino IDE, users write their code in a text editor and upload it to the Arduino board via a USB cable or other communication methods.
Arduino programming follows a basic structure that includes two essential functions: void setup() and void loop(). The setup() function is run once at the beginning of the program and is used to initialize variables, set pin modes, and perform any necessary setup tasks. The loop() function is then executed repeatedly, allowing for continuous execution of code or the repetition of specific tasks. By manipulating variables, using conditional statements, and utilizing various Arduino functions and libraries, users can create complex behaviors and functionalities in their Arduino projects.
Programming Languages for Arduino
While the Arduino IDE primarily uses the Arduino language, it is not limited to just that. Arduino boards can be programmed using other languages as well, such as Python, Java, or even basic HTML and JavaScript. This flexibility allows users to choose the programming language they are most comfortable with or that best suits their project requirements. Various third-party libraries and frameworks are available to facilitate programming in different languages. However, it is worth noting that the official Arduino IDE and the Arduino language provide a user-friendly and beginner-friendly environment for getting started with Arduino programming.
Uploading Code to Arduino Board
Once the Arduino code (also known as a sketch) is written, it needs to be uploaded to the Arduino board for execution. To upload the code, connect the Arduino board to the computer using a USB cable. Open the Arduino IDE and select the appropriate board and communication port from the Tools menu. Then, click on the “Upload” button or select “Upload” from the Sketch menu. The Arduino IDE will compile the code and upload it to the Arduino board, where it will be executed. During the uploading process, the Arduino board’s built-in LED may blink rapidly, indicating that the code is being transferred. Once the code has been successfully uploaded, the Arduino board will automatically start executing the instructions in the setup() and loop() functions.
Expanding Arduino Projects
Using Shields and Expansion Boards
Shields and expansion boards are additional hardware components that can be used to expand the capabilities of Arduino projects. Arduino shields are specially designed add-on boards that stack directly on top of an Arduino board, providing additional functionalities and features. Shields are available for various purposes, such as motor control, GPS, Ethernet connectivity, and wireless communication. They simplify the process of adding specific functionalities to Arduino projects, as they are designed to be compatible and easily connectable with Arduino boards.
Expansion boards, on the other hand, are separate boards that can be connected to Arduino via wires or cables. They offer similar functionalities as shields but provide greater flexibility in terms of physical configuration or placement. Some expansion boards come with pre-soldered components, such as sensors and connectors, while others allow for more customization, enabling users to choose and connect the desired components to match their specific project requirements.
By utilizing shields and expansion boards, Arduino projects can be extended to include functionalities such as motor control, wireless communication, data logging, audio output, and many others. These add-ons provide a convenient way to expand the capabilities of Arduino projects without the need for complex circuitry or additional wiring.
Connecting Arduino with Other Devices
Arduino projects often involve interfacing and communicating with other devices or systems, allowing for more interactive and interconnected projects. Arduino boards can be connected to various devices, such as computers, smartphones, sensors, actuators, and even other microcontrollers. For example, Arduino can be interfaced with a computer through USB, allowing it to send and receive data and instructions. This enables applications such as controlling Arduino projects from a computer or exchanging data between Arduino and a computer for data analysis or visualization.
Arduino’s flexibility and compatibility make it suitable for connecting with other devices and systems, such as Bluetooth modules for wireless communication, LCD displays for visual output, or RFID readers for identification and security applications. By integrating Arduino with other devices, users can expand the functionality and capabilities of their projects, enabling interaction with the external world and creating more immersive experiences.
Wireless Communication with Arduino
Wireless communication is a powerful feature that Arduino offers, allowing for remote control, data exchange, and connectivity with other devices. Arduino boards can be equipped with wireless communication modules such as Wi-Fi or Bluetooth modules, which enable wireless connectivity and communication. Wi-Fi modules enable Arduino to connect to local networks or the internet, opening up possibilities for IoT applications and remote control of Arduino projects through web interfaces or smartphone apps. Bluetooth modules, on the other hand, facilitate short-range wireless communication between Arduino and other Bluetooth-enabled devices, such as smartphones or other microcontrollers. This enables applications such as wireless data transmission or control of Arduino projects via smartphone apps.
By incorporating wireless communication into Arduino projects, users can create efficient and versatile systems that are not restricted by physical boundaries or wired connections. It allows for seamless integration with other devices and opens up possibilities for remote monitoring, control, and collaboration.

This image is property of store-usa.arduino.cc.
Troubleshooting Arduino Projects
Common Issues and Error Messages
When working on Arduino projects, it is inevitable to encounter issues or error messages. Some common issues that users may encounter include incorrect connections, faulty components, or problems with the Arduino board itself. Additionally, users may encounter error messages while compiling or uploading their code, which can be caused by syntax errors, missing libraries, or conflicts in the code.
To troubleshoot these issues, it is important to carefully review the connections and verify that they are correct. Double-check the wiring and ensure that all components are properly connected and functioning. Error messages in the Arduino IDE often provide clues about the source of the problem, such as pointing out syntax errors or missing libraries. Review the error message, cross-reference with the code, and make the necessary corrections.
Debugging Techniques
Debugging Arduino projects involves the process of identifying and fixing issues in the code or circuitry. Some common debugging techniques include using serial communication to print values or debug messages to the Serial Monitor in the Arduino IDE. This allows users to monitor the flow of the code, track variables, and identify potential issues. Serial communication can also be used to send and receive data between Arduino and a computer for real-time analysis or debugging.
Another powerful technique for debugging Arduino projects is the use of breadboards for prototyping. Breadboards allow users to quickly and easily connect and disconnect components, making it easier to test different configurations and troubleshoot circuitry issues. By isolating certain sections of the circuit and testing individual components, users can identify problematic areas and rectify the issue.
Online Communities and Forums for Troubleshooting
Arduino has a thriving online community of users, makers, and enthusiasts who are eager to help and share their knowledge. Online forums and communities provide an excellent resource for troubleshooting Arduino projects. Websites such as Arduino Forum, Arduino Stack Exchange, and Reddit’s r/arduino are popular platforms where users can ask questions, seek guidance, and share their experiences. These communities are populated by individuals who have encountered similar issues or have expertise in specific areas, making them valuable sources of information and support.
Moreover, Arduino’s official website and forum provide extensive documentation, tutorials, and troubleshooting guides. The Arduino Project Hub and Arduino Playground offer a vast collection of project ideas and examples, accompanied by detailed guides and code explanations. These online resources ensure that users always have access to assistance and troubleshooting advice when facing challenges in their Arduino projects.
Future Trends and Innovations
Latest Developments in Arduino World
The Arduino ecosystem is continuously evolving, with new developments and innovations constantly being introduced. One of the latest developments in the Arduino world is the introduction of the Arduino Nano RP2040 Connect board. This board is based on the powerful RP2040 microcontroller and combines wireless connectivity with the flexibility and ease of use of Arduino. The Arduino Nano RP2040 Connect allows for seamless integration of IoT applications and remote control, making it a cutting-edge solution for connected projects.
Furthermore, Arduino has been at the forefront of advancements in the field of robotics with the Arduino Robot, an all-in-one robotics platform designed to simplify the process of building and programming robots. Arduino’s commitment to democratizing technology and making it accessible to all has led to the development of educational platforms such as Arduino Education, which offers tailored educational solutions for students and educators, helping to empower the next generation of scientists and engineers.
Emerging Technologies and Applications
Arduino’s versatility and accessibility make it an ideal platform for exploring emerging technologies and applications. With the rise of the Internet of Things (IoT), Arduino can be seamlessly integrated with cloud platforms and other IoT devices, enabling applications such as smart homes, environmental monitoring, and industrial automation. The ability to connect Arduino with wireless communication modules and web interfaces opens up a world of possibilities for remote control, data analysis, and real-time monitoring.
Furthermore, Arduino is increasingly being used in the field of wearable technology, enabling the creation of innovative and interactive clothing, accessories, and health monitoring devices. By combining Arduino with sensors, microcontrollers, and flexible materials, users can design and build wearable projects that respond to external stimuli or gather biometric data in a non-invasive manner.
Another emerging area of application for Arduino is artificial intelligence (AI) and machine learning. Arduino can be used with AI platforms and libraries to create projects that leverage machine learning algorithms for tasks such as image recognition, natural language processing, or predictive analysis. This integration of Arduino with AI technologies allows for the development of smart systems, capable of advanced decision-making and automation.
DIY Electronics Kits in Education
One of the most significant trends in the adoption of DIY Electronics Kits is their integration into educational curricula. Arduino and DIY Electronics Kits offer a practical and engaging way for students to learn about electronics, coding, and problem-solving. By providing hands-on experiences and interactive projects, these kits promote active learning and critical thinking skills. They encourage students to explore their creativity, experiment, and apply their knowledge in real-world contexts.
Arduino-based educational kits and platforms, such as Arduino Education, provide educators with comprehensive resources and curriculum materials, making it easier to integrate Arduino into the classroom. These education-focused kits offer a structured learning path, gradually introducing students to the fundamentals of electronics and programming. They support project-based learning and inquiry-based activities, fostering a collaborative and interactive learning environment.
Furthermore, DIY Electronics Kits contribute to the development of important 21st-century skills, such as problem-solving, teamwork, and creativity. They empower students to become active creators and innovators, preparing them for the increasingly technology-driven world.
In conclusion, DIY Electronics Kits offer a fantastic opportunity for individuals of all skill levels to delve into the world of Arduino projects. These kits provide everything needed to get started, from components to step-by-step guidance, allowing makers to unleash their creativity and learn valuable skills in electronics, programming, and problem-solving. With a wide range of projects and applications to explore, the world of Arduino is full of endless possibilities for technology enthusiasts and learners alike. So, get started with a DIY Electronics Kit and embark on a journey of discovery and innovation!